
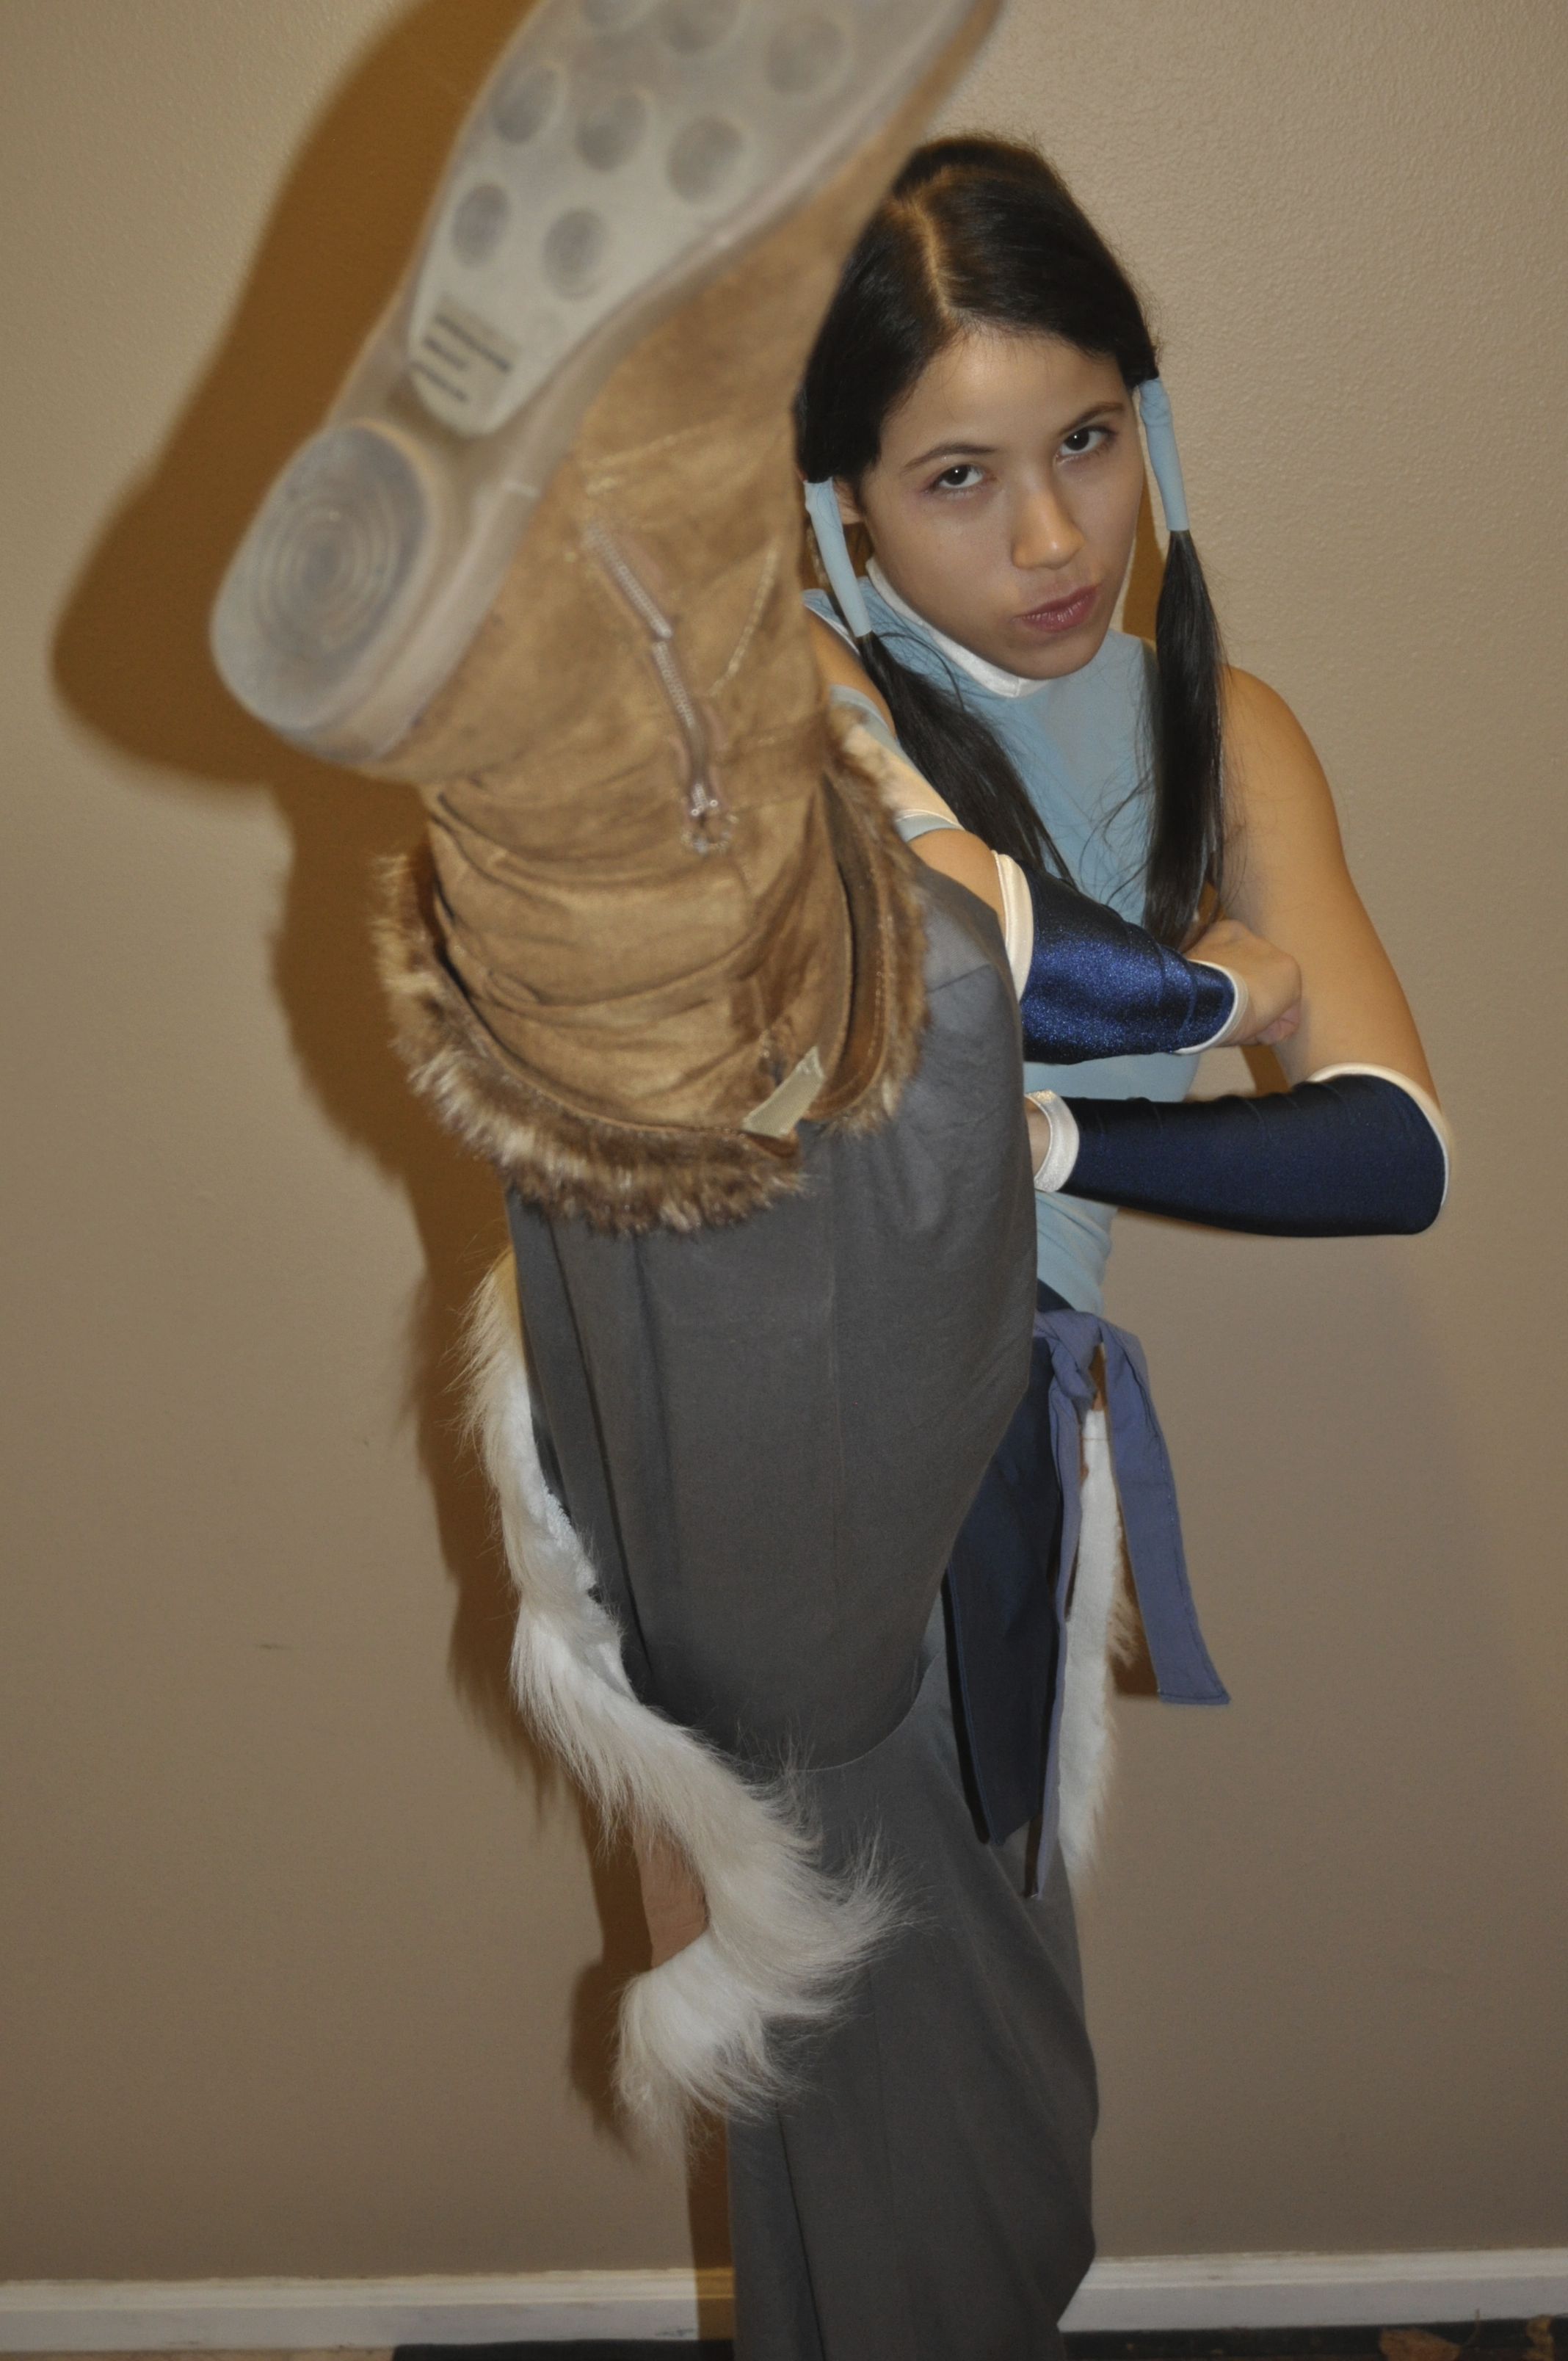
This is when I finally tell you how I made my Korra costume. I wish I had more “in progress” photos, but I have been somewhat pressed for time between work, school, and internship so when I got a chance to sew I just kept sewing.

I’ve already discussed the components of Korra’s costume, but let’s refresh:
- pair of baggy pants (blue-ish gray)
- navy triangular “apron”
- brown (suede) “skirt” that ties in the front and is edged with white fur trim
- light blue fitted shirt
- arm bands and hair wraps
- fur-lined boots
Let’s start with the pants.
I used a commercial pattern (Simplicity 4059), which I had previously used for Greg’s Renaissance Costume (and which he has worn as Ezio). As this costume is designed for men I opted for the XS pattern size, and was pleasantly surprised when it fit almost perfectly around the waist. I extended the pattern about 10 inches so that the pant legs would reach my ankles. I needed to be able to tuck these securely into boots.
I also reduced the height of the waistband/yoke so that the pants would sit lower on my hips. However, I should have adjusted the circumference of the waist band when I adjusted the height of the yoke. When I put everything together the pants and skirts sat a bit lower than was comfortable, so I used a binder clip to tighten the pants at the waist.
I highly recommend picking up this pattern when your local fabric or craft store has a sale on Simplicity Patterns. It has many uses. If you are not comfortable drafting your own patterns, adapting existing patterns is a great solution.
Top:
I’ve shown you photos of this pattern before. I used a pattern block I drafted during a sewing class for a “close fitting top” and then added the bottom part. If you are interested in drafting something like this, I would recommend using these instructions. Draft your pattern onto strong drawing paper and then trace the pattern onto tissue paper (or pattern paper) to start making adjustments.
I extended the neckline up 2 inches, drew in the notched collar, and made adjustments based on the muslin I tested. I also added some length to the seam allowance at the crotch, in order to have enough space to add snaps (which I was sewing into place during Billy Dee William’s panel at ECCC!).
I cut out 2 pieces of fabric for the front and 1 for the back. To make the front stronger and more supportive, I sewed the two front pieces together with a zig-zap stitch along the edge. Then I proceeded to sew front and back together along the side seams and the shoulder/neck seams.

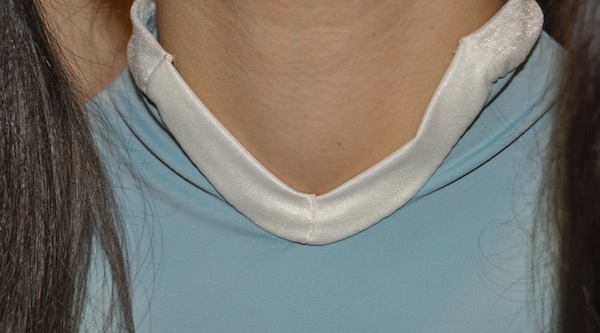
Neck trim:
I cut a strip of white spandex that was 2 inches wide and the length of my collar. *Measure the circumference of neckline of shirt, including the front notch.* Using a 1/2-inch or 3/8-inch seam allowance, I started sewing from the back of the collar. When I got to corners of the front notch I adjusted the trim so that the seams matched, even if the folded edge puckered. I apologize for not getting a photo of the next step. Where the trim puckered at the corners, I pinched the excess fabric on the inside of the collar and hand-stitched this flap so that the front side of the trim appears smooth (but with a small seam at the vertices).
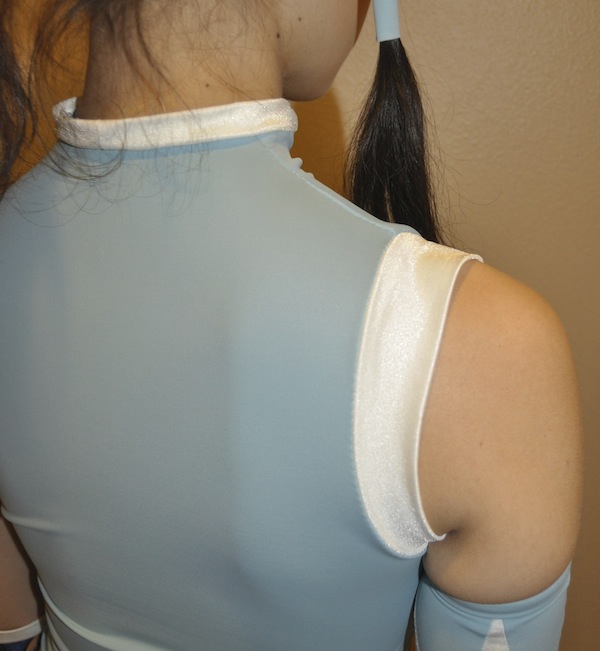
The armhole trim:

Front & Back skirts:
Again, because I already had a skirt pattern block, I used that as my base. I created partial A-line skirt patterns for the front and back, then drew in the angled hems. For the suede skirt, I extended the skirt waist band to be about 3/4 of my hips circumference.
For wearing, I pinned the navy skirt to the pants’ waist band.
The suede skirt provided an opportunity to learn how to work with faux fur. These online tutorials were helpful:
- http://www.violetlebeaux.com/2010/06/diy-faux-fur-trim-for-your-jacket/
- http://www.instructables.com/id/How-to-Cut-Sew-Faux-Fur
- http://www.fiber-images.com/Free_Things/Reference_Charts/free_reference_charts_handsewing_stitches.html
When cutting faux fur, turn the wrong side up and use an exacto knit to cut the backing, then pull the pieces apart. If you use scissors and cut the fur like normal fabric, you risk cutting the fur hairs and they will look uneven on the final garment.
Armbands:
If it wasn’t obvious before, pattern drafting involves math. Don’t be afraid. I assure you that most calculations can be done on your smart phone (subtraction, fractions, addition, and a tiny bit of division).
Take the following measurements-
- wrist circumference
- forearm circumference (just below elbow)
- Length of wrist to desired top of band
- Bicep circumferences (2 inches above elbow and just below arm pit)
- desired vertical length of bicep band (I opted for 5 inches)

While I used zig-zag stitches for the seams of the bodice to allow for stretching, I used straight stitches for sewing the triangles of the bicep arm band together.


Hairbands:
Made 30 minutes before we left the house. I put my hair into braids and a high pony tail, measured how long I wanted the hair bands to be, cut them out, fold in half “hot dog style” with right sides together, and stitched 1/4 inch from the edge. After turning the bands right side out, I pulled them over my hair sections and we left for the con.
For the high ponytail, I braided about 2 inches of hair starting at the base of the ponytail. Tie in a second hair tie, and then reinforce with bobby pins to keep it upright.
I opted to skip the white trim on these bands for the sake of time and sanity.
~~
Well, that about wraps up my costume notes for Korra. Please let me know if you have any questions.

Hi, I love your Korra cosplay, I am working on one for a comic con coming up, where was the pattern you used for the shirt?
I will look up the website I used. I also already had a fitted t-shirt pattern that I drafted in a class. I will find the instructions.
I’d love to get my hands on that shirt pattern too! Did you ever find it?
Thanks 🙂
Well, the website I used (patternschool.com) appears to be gone. Or moved to another site. And I can’t find the instructions for the close fitting shirt. I am really sorry.
HOWEVER, if you haven’t already visited my cosplaying and sewing compatriot The Geeky Seamstress, I highly encourage you to. http://thegeekyseamstress.com/?s=spandex She has written a lot about working with spandex. She used Kwik Sew 3154 (which might be out of print) but there are other leotard (think ice skating or gymnastics) commercial patterns out there that are waiting to be modified.
http://www.patternpostie.com/dancewear-leotards
http://www.jalie.com/sports-apparel/gymnastics-leotard-patterns.html
http://kwiksew.mccall.com/leotards—activewear-pages-3338.php
Good luck!