
The Pacific Northwest was preparing for a potentially record-breaking storm this weekend. I am equal parts releieved and disappointed to report that the storm did not live up to the predictions, at least not in my neighborhood. The lights flickered when I was making dinner, and the rain was coming sideways for an hour.
In anticipation of the storm, I made plans to not leave my house. I started the day by unintentionally sleeping in until 11:30am. I haven’t slept in like that in a long while, and I clearly needed it. I feel great. After a cup of coffee and cereal I went upstairs to watch a couple friends stream on Twitch and do a little sewing.
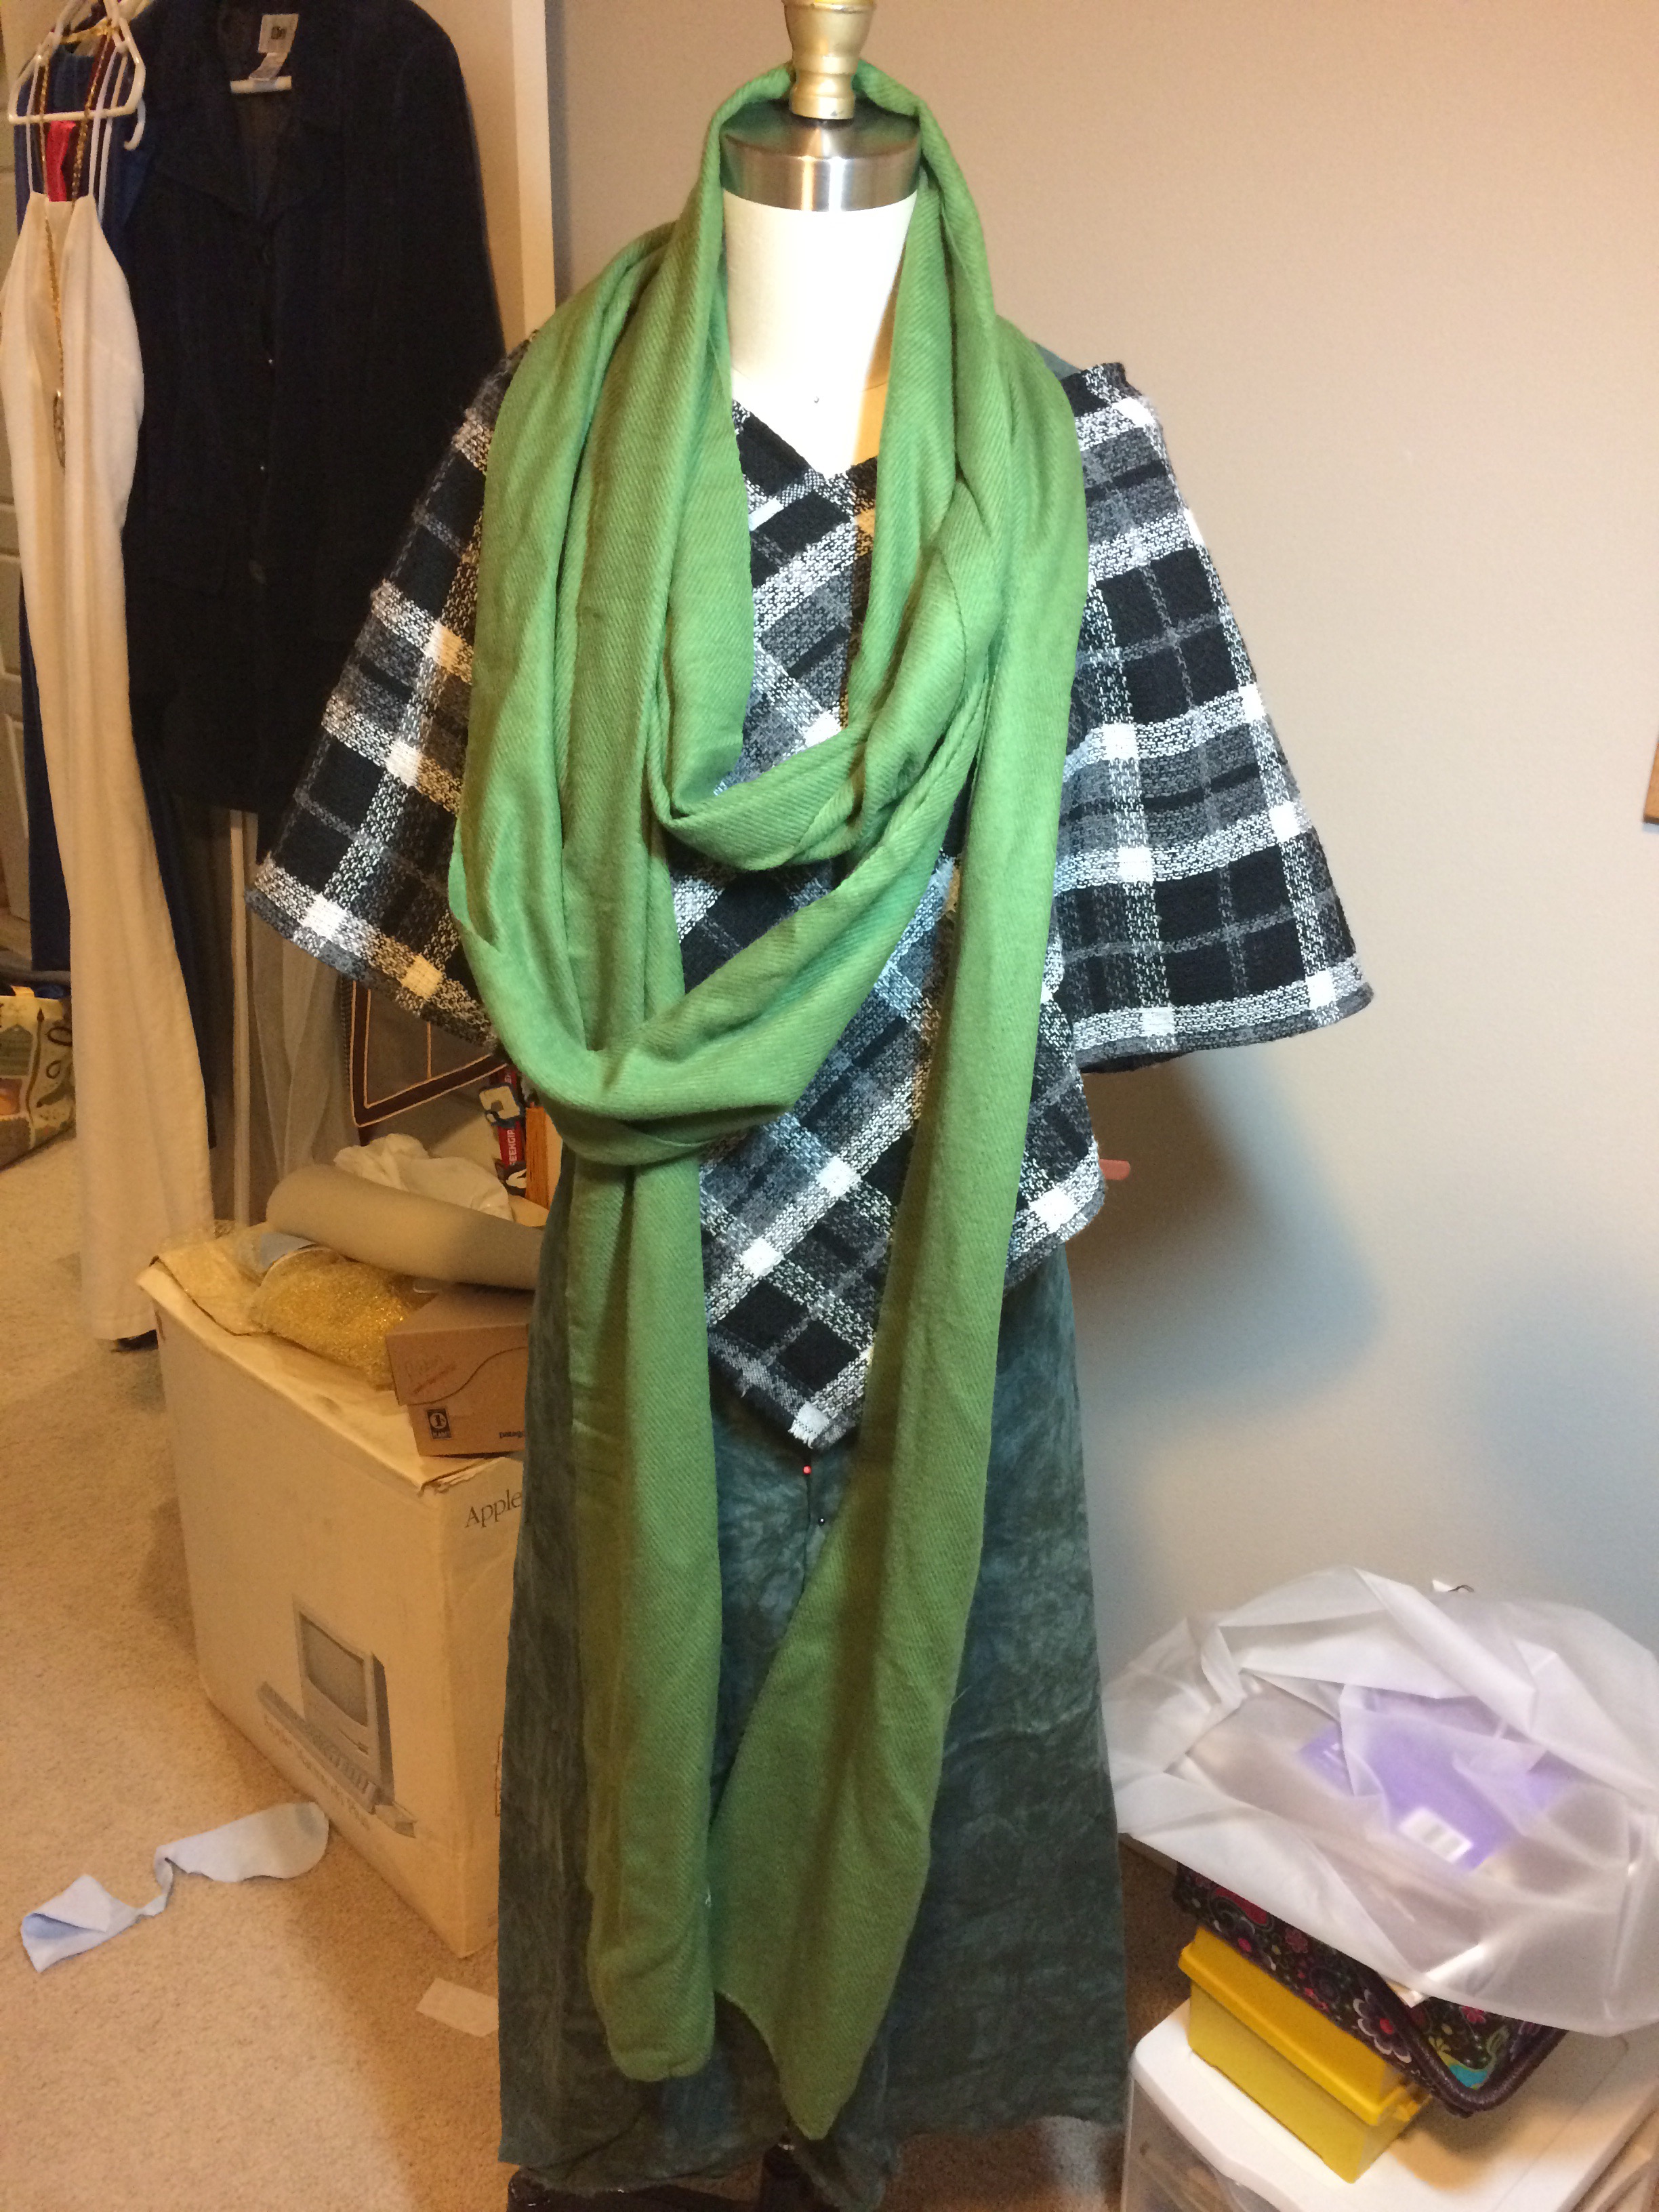
Plaid Poncho
I found about 1/3 of a yard of polyester-mix plaid “wool” in the remnants bin at Pacific Fabrics. It cost me $3.11. I only made two cuts: I trimmed off a small section to even up the remnant and the I cut the 60″ wide fabric in half so each was 18″ x 30″.
I serged the raw edges before piecing it together. Those of you with a regular sewing machine can finish the edges with a medium zig-zag stitch. The construction isn’t complicated, but I used this tutorial to double check my work. She has great step-by-step photos:
http://smileandwave.typepad.com/blog/2012/11/poncho-diy.html
In total, this probably took me about an hour to finish. Most of that time was spent decided how I wanted to piece it together…and getting the cat to move. I wasn’t until I read her blog that I realized I needed to cut it in half.


Green Shirred Scarf

I called my green scarf my seaweed scarf. It really did look like a batch of kelp. The scarf I owned always looked a little bulky with those ruffels, and while I love the green color, I stopped wearing it. Then I realized I could easily remove the eleastic thread.
When you remove the elastic the scarf becomes SUPER long – like over 10 feet. Thankfully the fabric is very soft and not bulky so I can wrap it multiple times around my neck. It looks good with the poncho I made, concealing the slightly gaping neckline.
This was an easy 30-minute refashion and I gave the scarf new life in my wardrobe.
Wool Skirt Alterations
Having the skills to alter ready-to-wear clothing opens up so many possibilities when I got to thrift shops. And when it comes to RTW skirts and pants, I rarely find anything that fits perfectly. When I bought this skirt, I was just starting the Wardrobe Architect project and one of the looks I was digging was the wool/tweed skirt + sweater + boots + scarf look. I had grand plans for this skirt, which started as a size 4 Banana Republic skirt that always sat a little awkwardly on my hips and extended well past my knees.
The skirt has two slide pockets that I did not want to lose, so the waist alterations had to happen at the back of the skirt rather than the side seams. I pinned the skirt in place and removed about two inches at the waist band, grading out to the center back seam at the widest part of my hips/rear end. In hindsight, I wonder if I could have just made the back darts bigger.
The most challenging part was the waist band, which did not have a center back seam. I was initially reluctant to cut into the waistband, but so few people are going to be looking at the small of my back, so I just [metaphorically] closed my eyes and cut. 🙂 And then resewed the seam.

It is funny. My mom tried to give two of her handsewn wool skirts years ago – front buttons and all. I should see if she still has them.
I am immensly satisfied with what I accomplished today. I plan to combine all of these into an outfit for an alumnae gathering tomorrow. We’ll be having high tea. 🙂

Featured Photo by Joy Stamp – https://unsplash.com/photos/pGQbWXBC1dA

The skirt looks really good on you. It sounds like you had a really great sewing-day.
Thank you! It was just the kind of day that I needed. I had been in a funk and I think I started to crawl out on Saturday.