
Today marks Greg and my one-year marriage anniversary, as well as our six-year dating anniversary. We started our marriage with a triad of celebrations – our official ceremony with parents and witnesses in attendance, an extended family reception, and a gathering at a bar with friends and games. It sounds extravagant but each gathering was simple and tailored to a specific group of loved ones.
The one question I was asked again and again during our short engagement was, “Will you be making your wedding dress?” I did, but I couldn’t stop there. 🙂
I have been meaning to write this post for, well, a year.
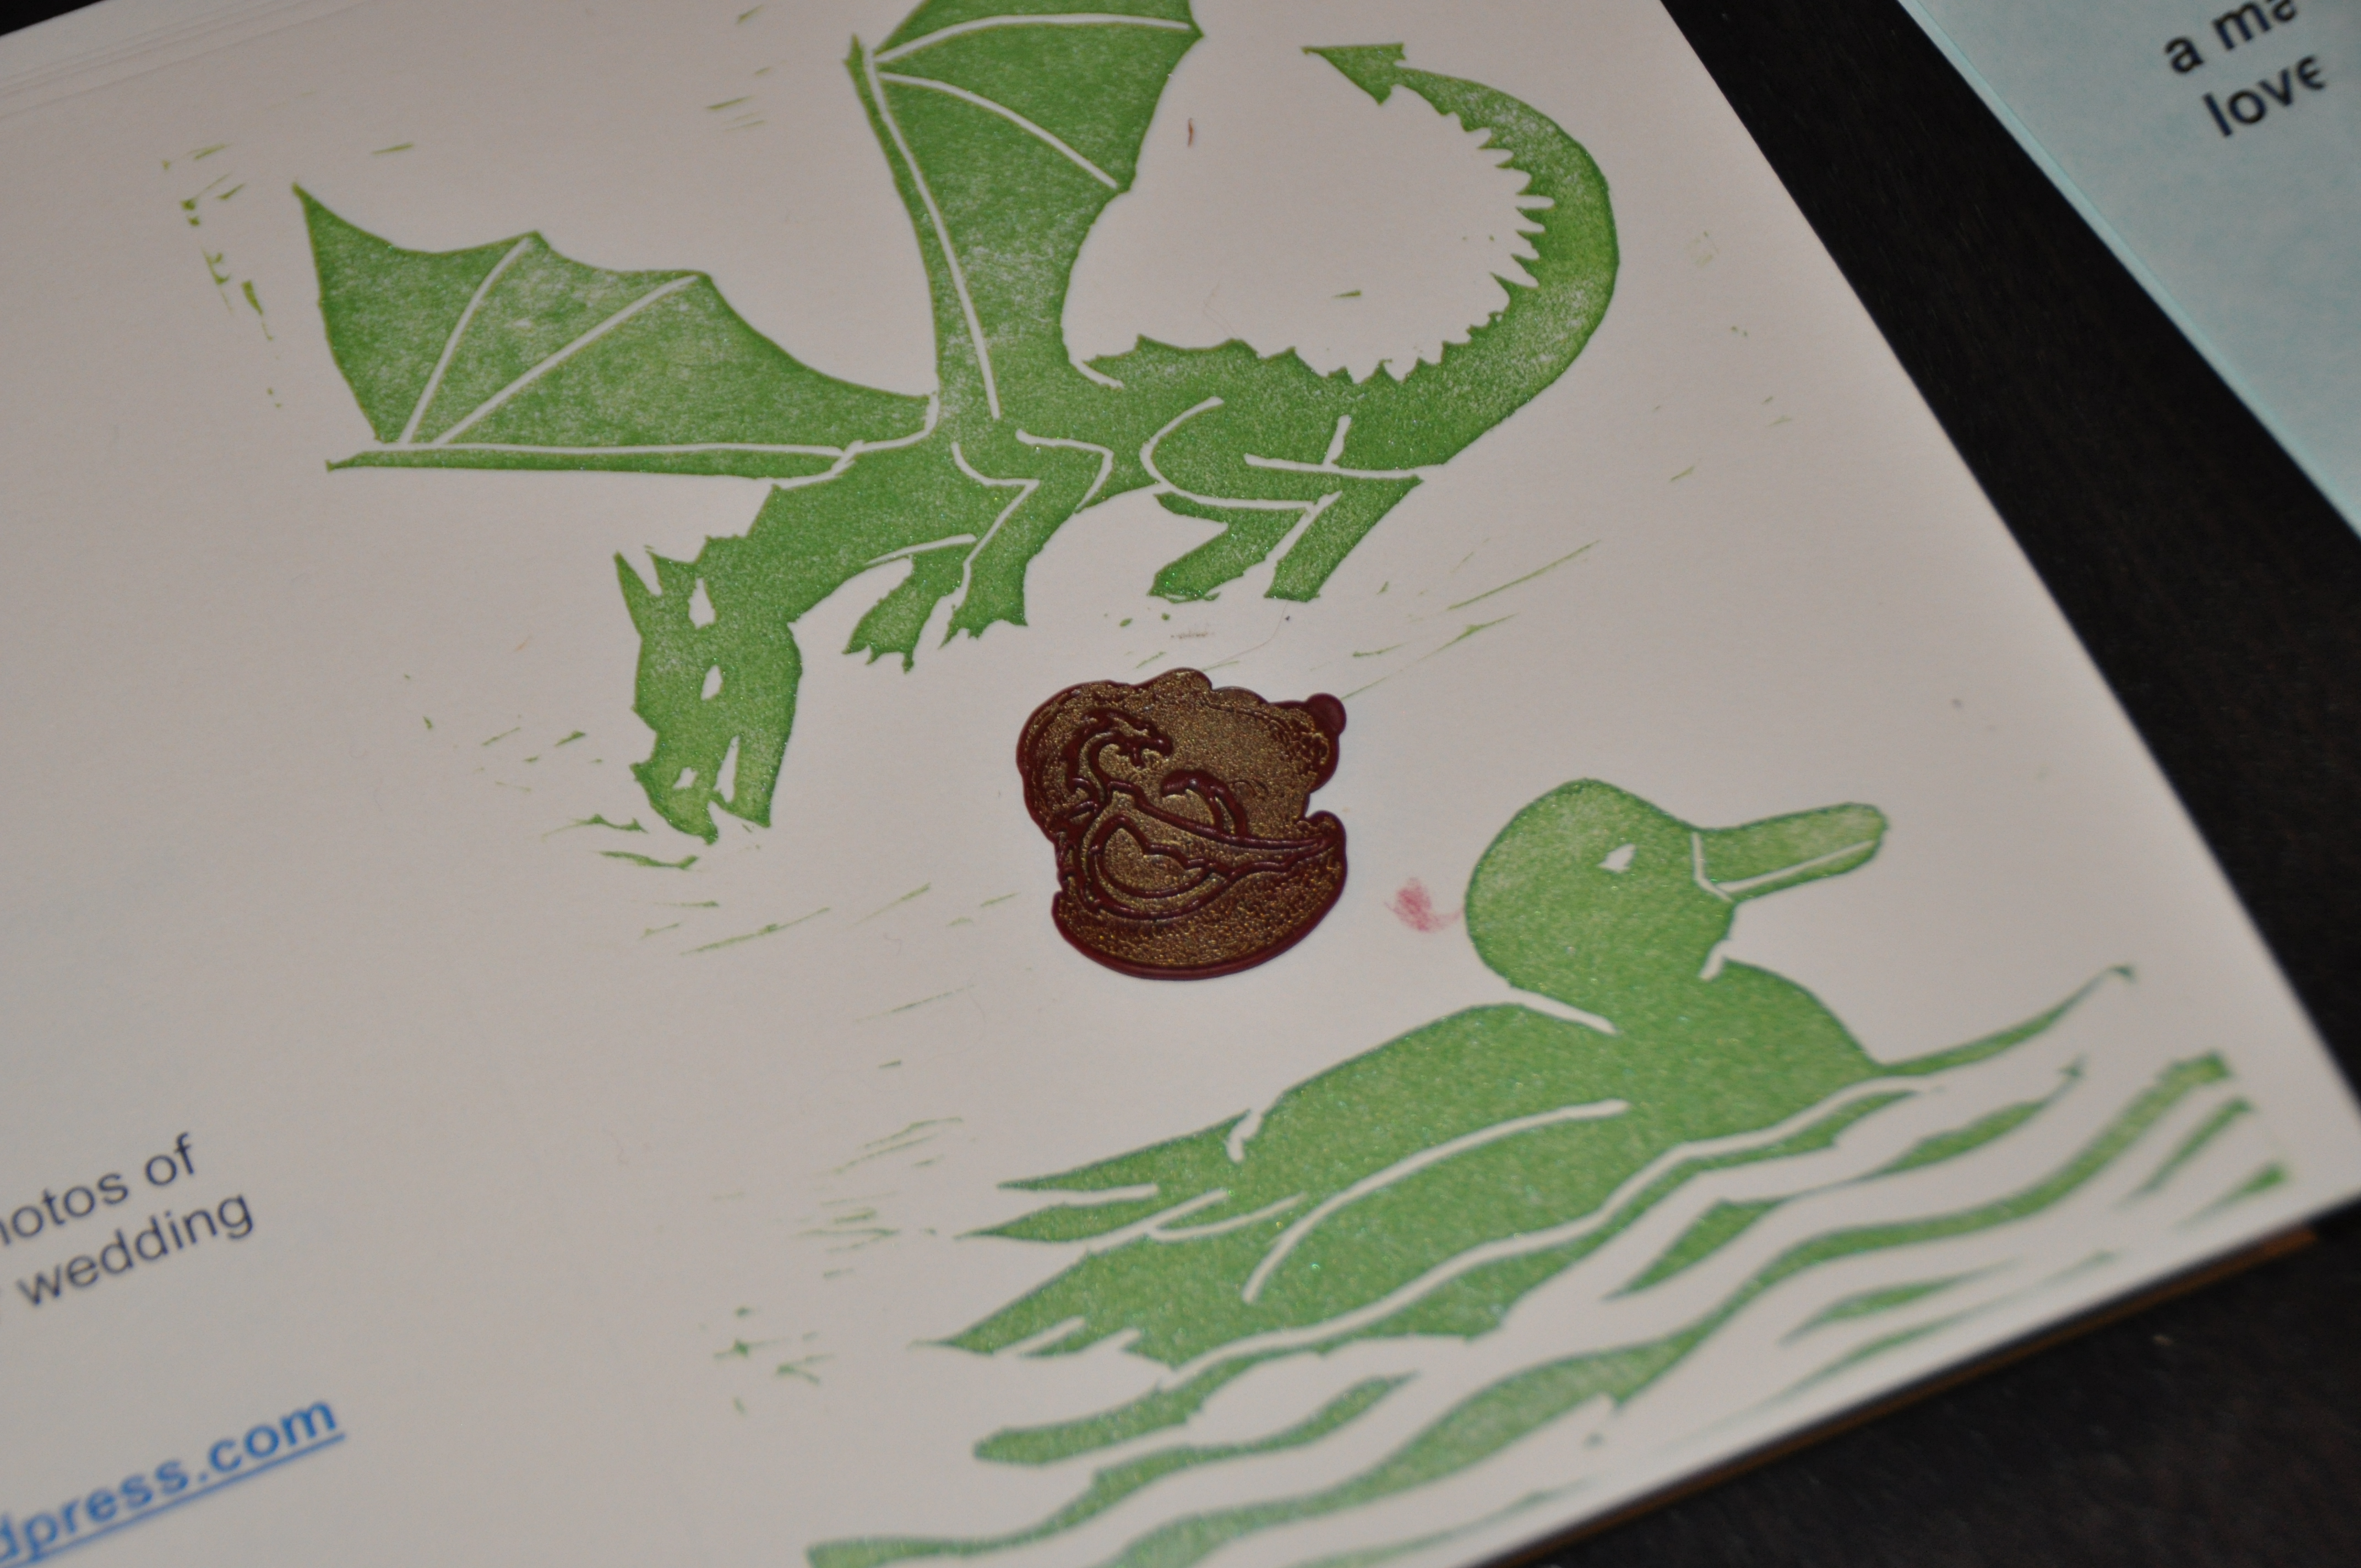
Invitations – Dragons, Ducks, & Block Prints
We were very high-tech with regards to our celebrations, e-vites, a Facebook event, and a webpage. For the extended family reception I decided to go traditional. I only had 25 invitations to send after all. (Only, HA!)
Block printing is one of my favorite art forms. I fell in love with it during an high school art class. Painting or drawing are additive processes – you layer on more paint or more pencil shading to create the image. Block printing requires you to see your image differently, it challenges you to think about it in reverse. You start with a blank canvas but you are carving away the negative space and leaving what will become the lines and the shading. And once you carve or cut away, you can rarely put it back in place. I now notice that it shares similarities with sewing.
I think I had seen some block printed invitations on Etsy and immediately knew that was my solution. I could carve one image and then stamp it multiple times. Brilliant!
I settled on a dragon and duck motif to convey the depths of our relationship. We both loved fantasy and Dungeons & Dragons (check). We both enjoyed birding (check). I grew up loving ducks and Greg’s college mascot was a duck (check). I’m Chinese and dragons are a large part of Chinese iconography (check). To further hammer home the geeky heart of our relationship I used the officially licensed D&D ampersand wax seal that was given away one year at Gen Con.
I hand drew my dragon and duck, then scanned the images to play with their arrangement in Pixelmator (Photoshop wannabe software). To transfer the drawings onto the rubber carving block I traced over the final lines with a pencil, turned the paper over on the rubber carving block and rubbed over all the lines. This rubber takes graphite very easily.
The images I drew were outlines, but I wanted the prints to feature filled in. Using the linoleum cutting tool I’d had since high school, I carved away the lines (they would appear white on the final print) and carved always all the block around the dragon and the duck.
Even 25 invitations was a lot. My fingers were sore from pressing the block down each time. For each wax seal, I first tapped the seal on a gold rubber stamp pad so that you could more clearly see the ampersand. My wax dripping could use some work. Anyone need any parchment scrolls sent?
Dress – Simply Red

Red because I wanted to be offbeat and sneakily traditional at the same time. Before white western wedding dress fashions crossed the Pacific, red was an important color Chinese weddings and wedding dresses. Red is a lucky color. I wasn’t crazy about wearing white, but I loved the idea of honoring my Chinese heritage with this nod to traditional wedding colors.
I already had a fabric picked out – the red taffeta I had used for Greg’s Ezio Auditore costume. I love the sheen and the vibrancy of this particular red. It has the right balance of yellow and blue and photographs well as “true red”. The taffeta previously bled onto the white fabric of Ezio’s costume. I soaked the remaining fabric in vinegar for a few days. (Spoilers, it still rubs off on my bra…) All I had to buy for the dress was a invisible zipper and the pattern.
I ultimately settled on Simplicity 1418 (part of the Project Runway series), which I picked up at Joann’s for $2. I liked the flared skirt, fitted bodice, and the off-the-shoulder detail. I did have to do a bit of pattern adjustment for the skirt back. My derrière is a bit bigger than the standard pattern size and the wide pleats spread out across the fullest part.
The final dress ended up a tiny bit too big. I think this is a combination of letting the seam allowances slip a bit and forgetting that the taffeta has more stretch than the muslin fabric I used to fit. I also kept bouncing between sizes. I made a muslin for sizes 8, 10, and 12, mixing and matching. I think I settled on 10 bodice and 12 skirt. I think maybe I should have stuck with an 8 bodice.
This dress makes me so happy. I wore it to each of my three celebrations. At the gathering with friends, I wore my Assassin’s Creed doublet over the dress.
Shoes – BY hourglass footwear

I knew I was going to be saving loads of money on the dress, so I decided I would splurge on the shoes. This design, Double Happiness, was perfect. Not only is Double Happiness a traditional Chinese wedding message, but the colors matched my dress and gold accessories, and the designer of these shoes designated a percentage of their revenue to marriage equality in Washington State.
Headband – Gold Medals

I had decided that a veil wasn’t for me, especially not with the dress I had made. But I felt underdressed without some kind of head adornment. Pinterest provided the appropriate inspiration for a simple headband with some fabric flowers or pearls.
I dug through my stash and found the gold curly notions in the lower right corner. Then I went to Pacific Fabric’s Northgate store to look through their fancy fabrics. For $2 (they let you take as little as 2 inches of the super fancy fabrics that would cost $25 per yard), I came home with a strip of gold medallions.
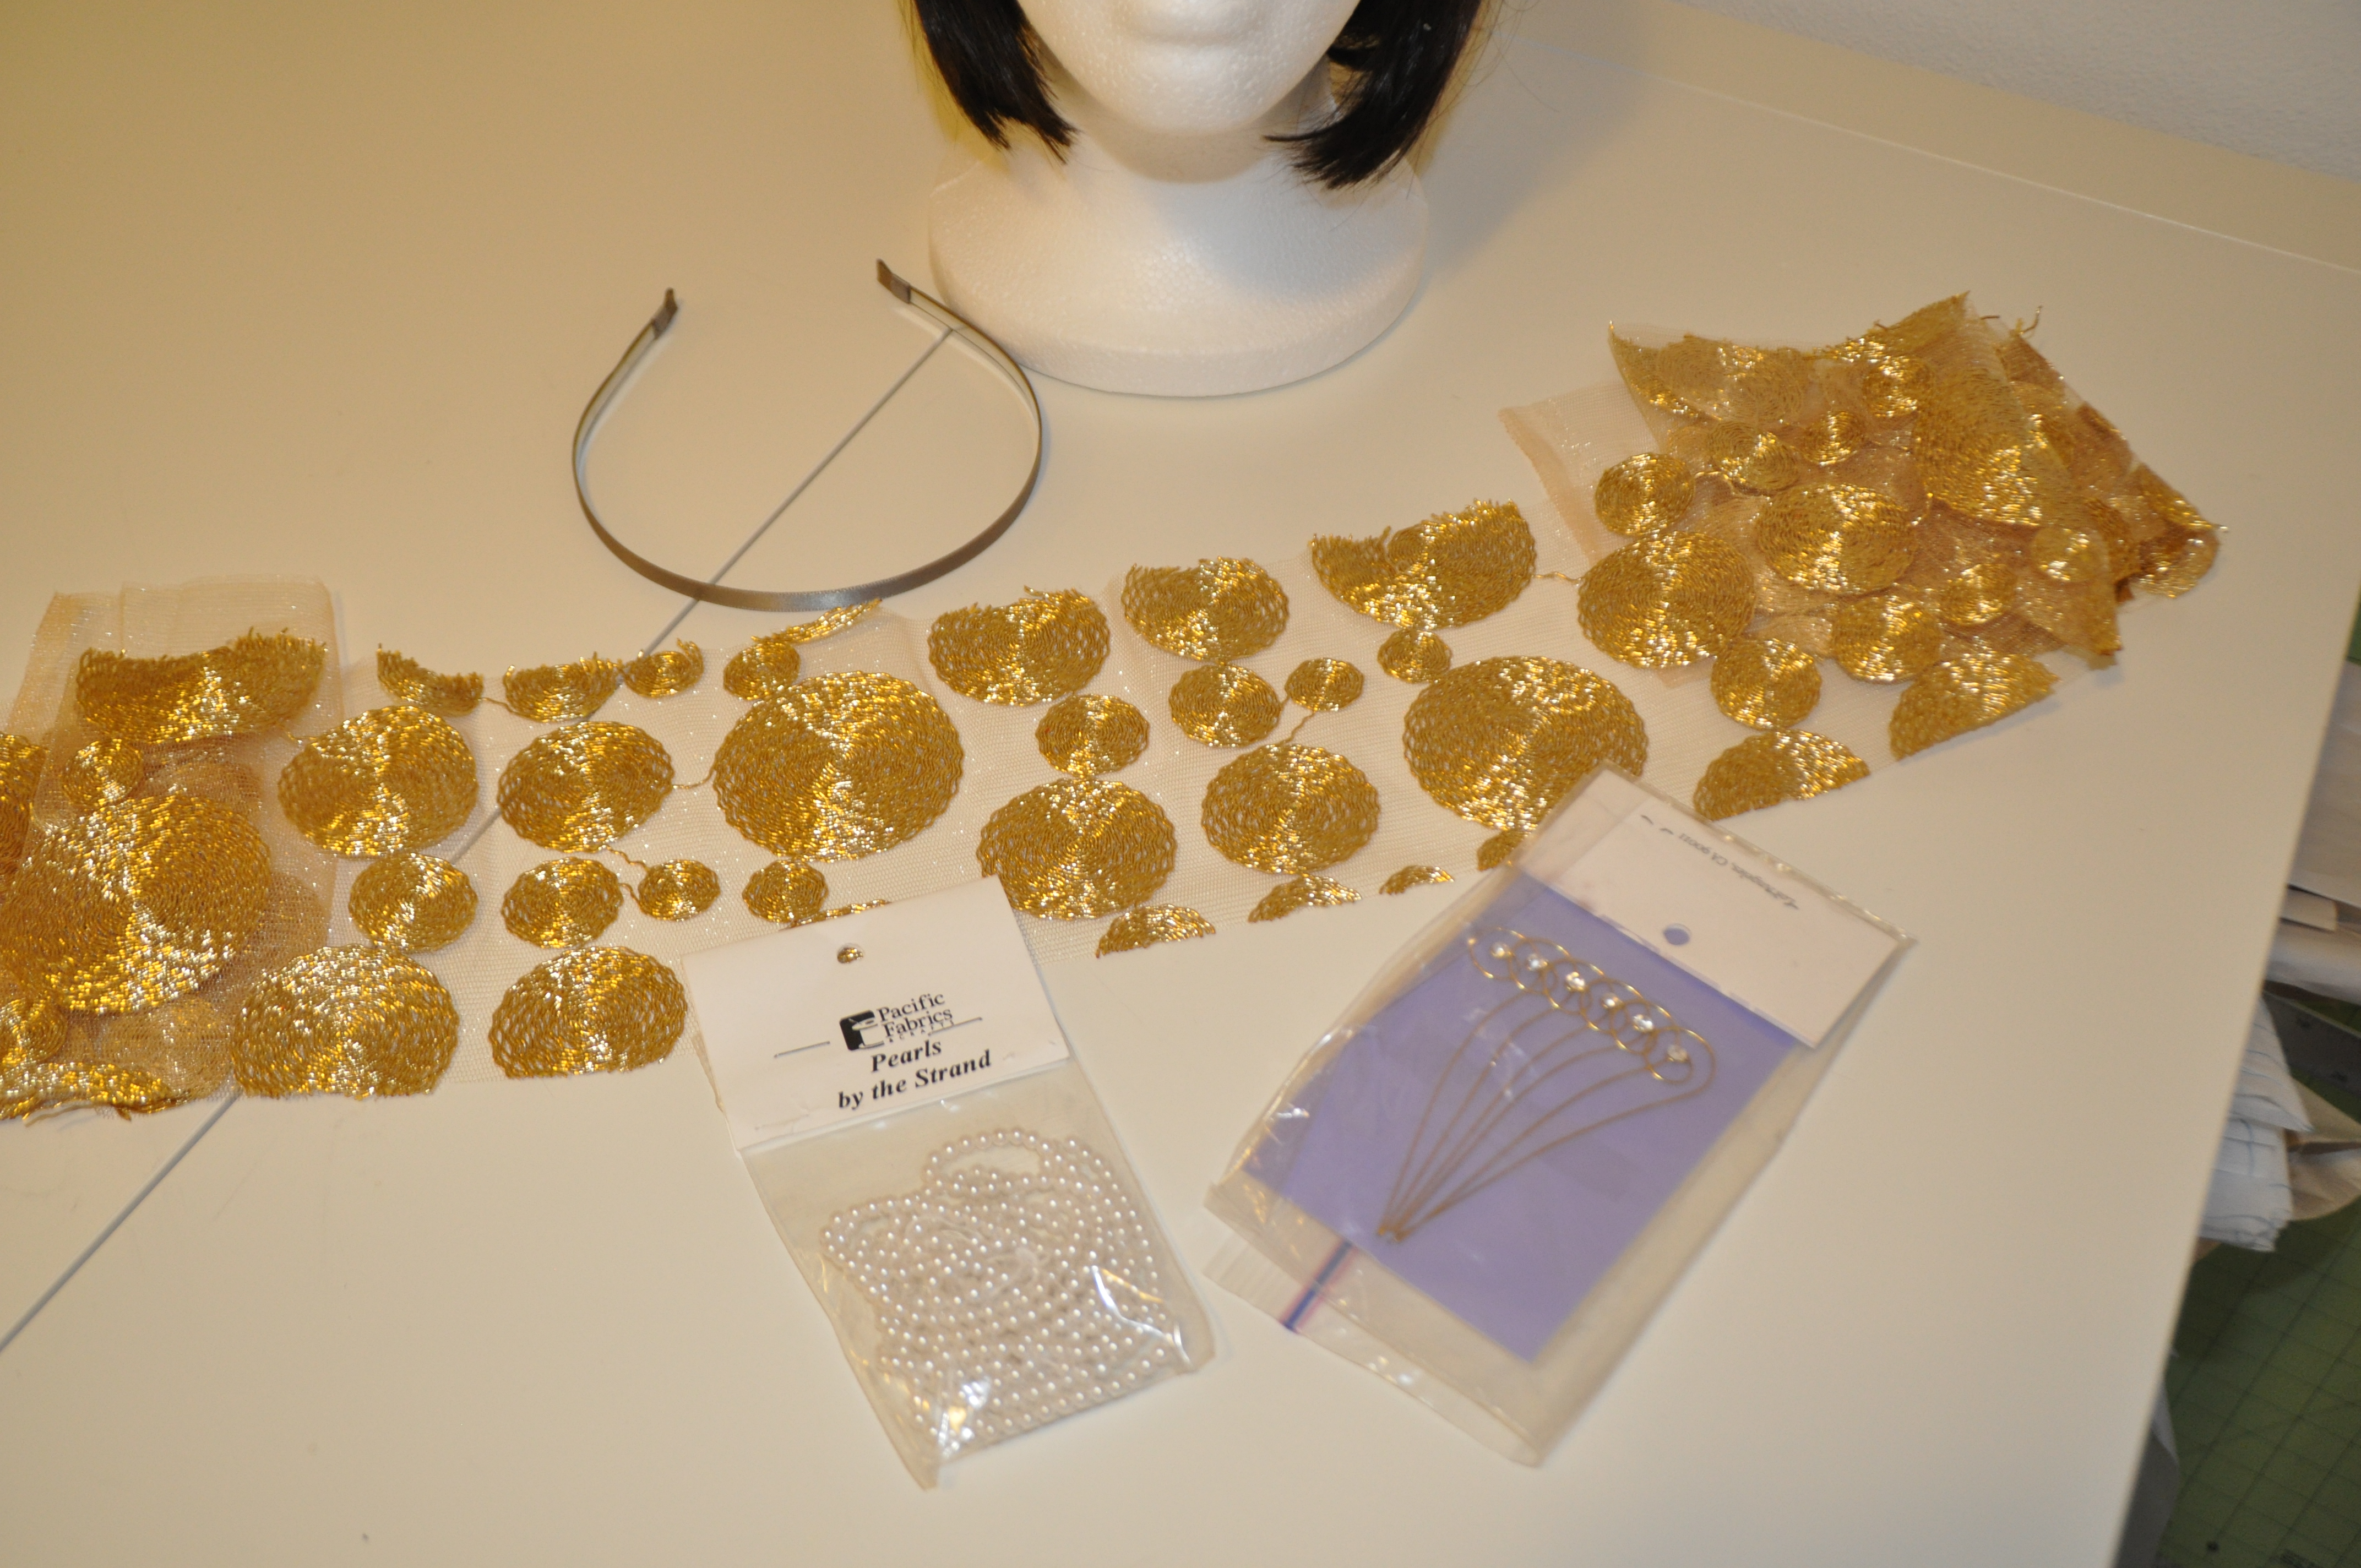
Then I started playing with layouts. The pearls ended up being too three-dimensional when used with the flat fabric and gold “vines”. Because odd numbers are always more interesting, I used sets of 3 gold medallions and 3 gold vines.
As projects go, this headband serves as a wonderful example of what you can achieve when you don’t fret about the details and just try stuff out. The time that passed between these two photos was 3 days. I finished this 4 days before the wedding. 🙂
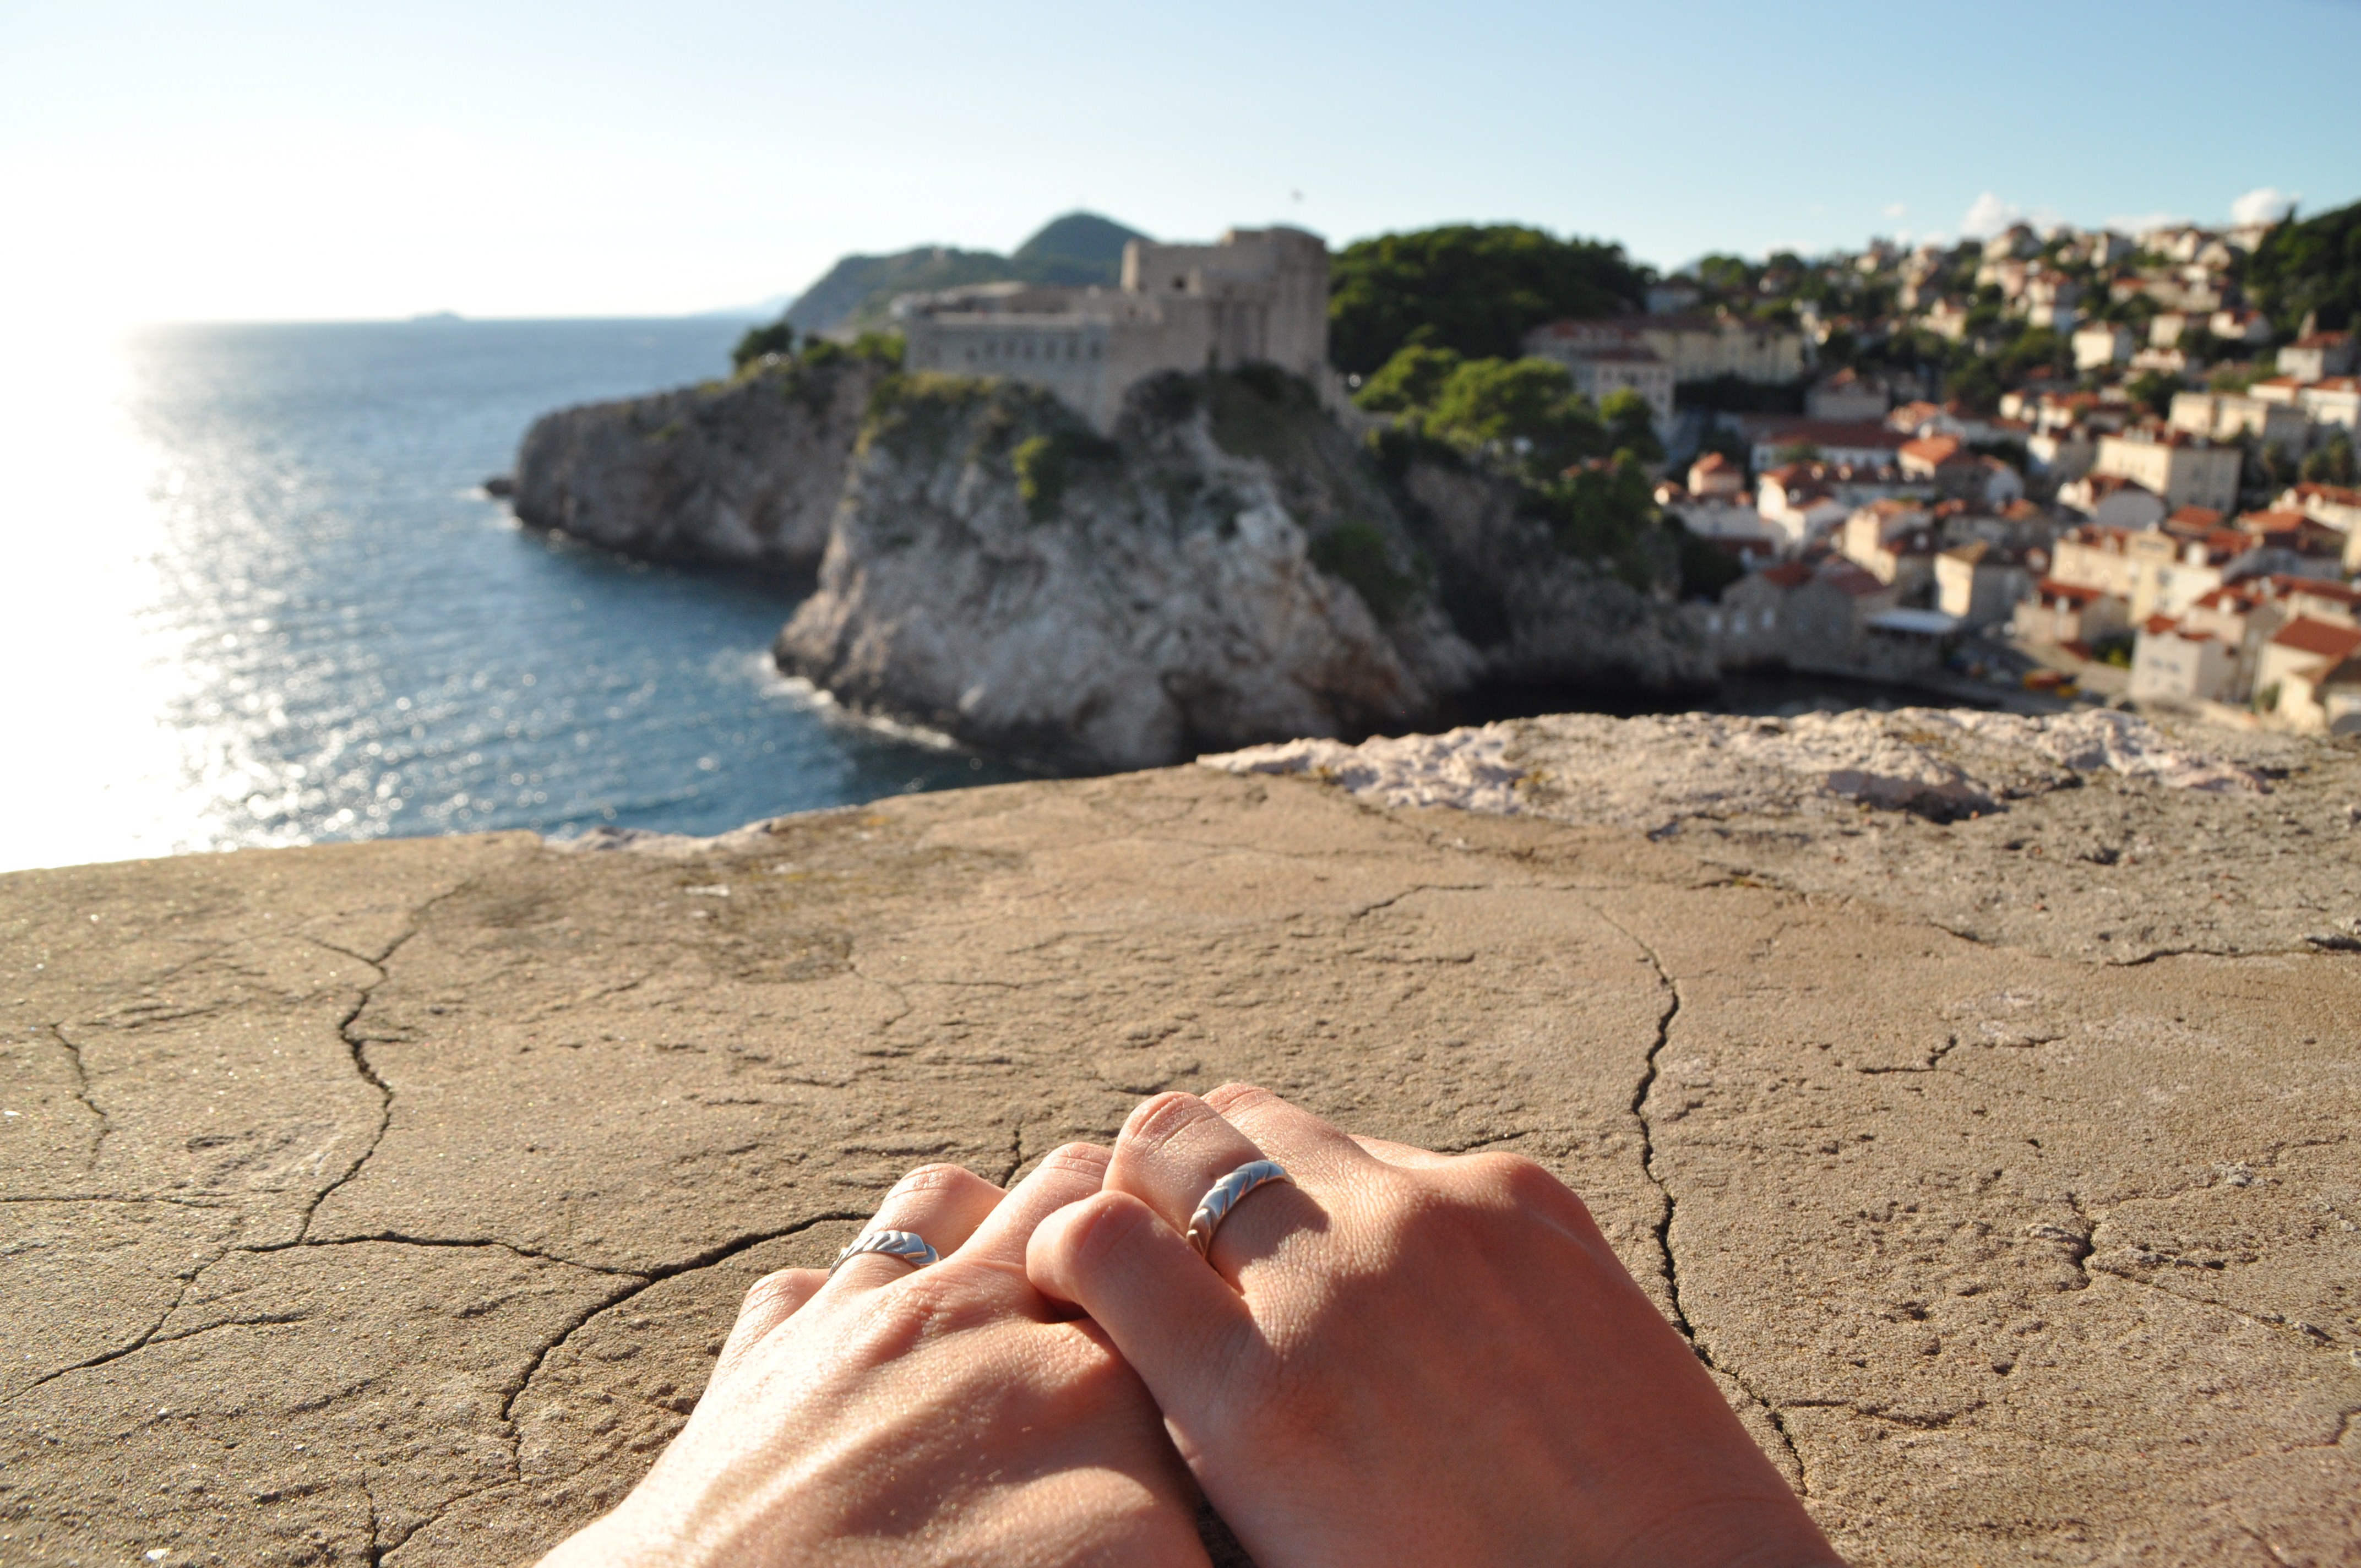
Rings – with these rings We Wed

After a year of adventures, which included a honeymoon in Bravos, Kings Landing, and Mereen, my ring could use a good polish.
A year ago we vowed to be adventuring companions and partners in life. We are looking forward to what year two will bring.
UPDATE! I have to share the amazing handmade anniversary gift Greg unveiled this morning.
A Legend of Zelda Triforce shelf! 

Love love love everything in this post! That story about how you came up with your invitation motifs and how you planned out and coordinated your wedding outfit! Your three celebrations based on what the guests would like! You should be on Offbeat Bride 🙂